Introduction to Group Craft Activities
As a mom of three energetic kids, I’ve hosted my fair share of playdates and birthday parties. Let me tell you, finding activities that keep multiple children engaged, happy, and (somewhat) clean is no small feat! Group craft activities have become my secret weapon for these gatherings.
I’ve discovered that crafting together offers so much more than just keeping little hands busy. When children create together, they develop crucial social skills like sharing, taking turns, and collaborating. They learn to communicate their ideas and appreciate others’ perspectives. Plus, there’s something magical about watching kids beam with pride as they show off their finished creations.
After years of trial and error (including one memorable disaster involving glitter that I’m still finding around the house), I’ve compiled 18 of my most successful group craft activities for kids. These projects are perfect for parties, playdates, classroom settings, or rainy day fun. Let’s dive in!
Paper Plate Animals

Paper plate animals remain one of my go-to group craft activities because they’re inexpensive, adaptable for different ages, and absolutely adorable. My daughter’s 6th birthday party featured a “zoo” theme where each child created their own animal to take home.
What makes this craft special is how each child’s personality shines through. Even when making the same animal, no two creations ever look alike!
- Materials needed: Paper plates, construction paper, markers, paint, glue sticks, scissors, googly eyes, pipe cleaners, and pom-poms
- Prep time: 15 minutes to gather and organize supplies
- Ideal age range: 3-10 years (with age-appropriate supervision)
- Mess level: Medium (paint can get messy, but washable paint helps!)
For younger children, I recommend pre-cutting some basic shapes (ears, tails, etc.) while letting older kids do their own cutting. Set up a “buffet” of craft supplies and let creativity flow!
Pro Tip: Create a sample animal beforehand to inspire the kids, but make it clear that their creations don’t have to match yours exactly. I’ve found this reduces frustration while still providing guidance.
Friendship Bracelets

Making friendship bracelets together creates both beautiful accessories and meaningful connections between children. I still remember the look of concentration on my son’s face as he carefully followed the pattern to make a bracelet for his best friend.
This activity works wonderfully for slightly older children who have the patience and dexterity for the task. The best part? Kids can wear their creations immediately!
- Materials needed: Embroidery floss in various colors, scissors, tape or safety pins, beads (optional)
- Prep time: 10 minutes to cut string and organize materials
- Ideal age range: 7+ (younger children can do simpler versions)
- Mess level: Low (mostly just string scraps)
For beginners, start with simple three-strand braids. More experienced crafters can try patterns like chevron or diagonal stripes. Having printed instructions with diagrams helps tremendously.
Pro Tip: Pre-cut strings to equal lengths (about 24-30 inches) and group them by color scheme to save time. I also recommend taping one end of each bracelet-in-progress to a table or clipboard to keep it steady while working.
DIY Bird Feeders
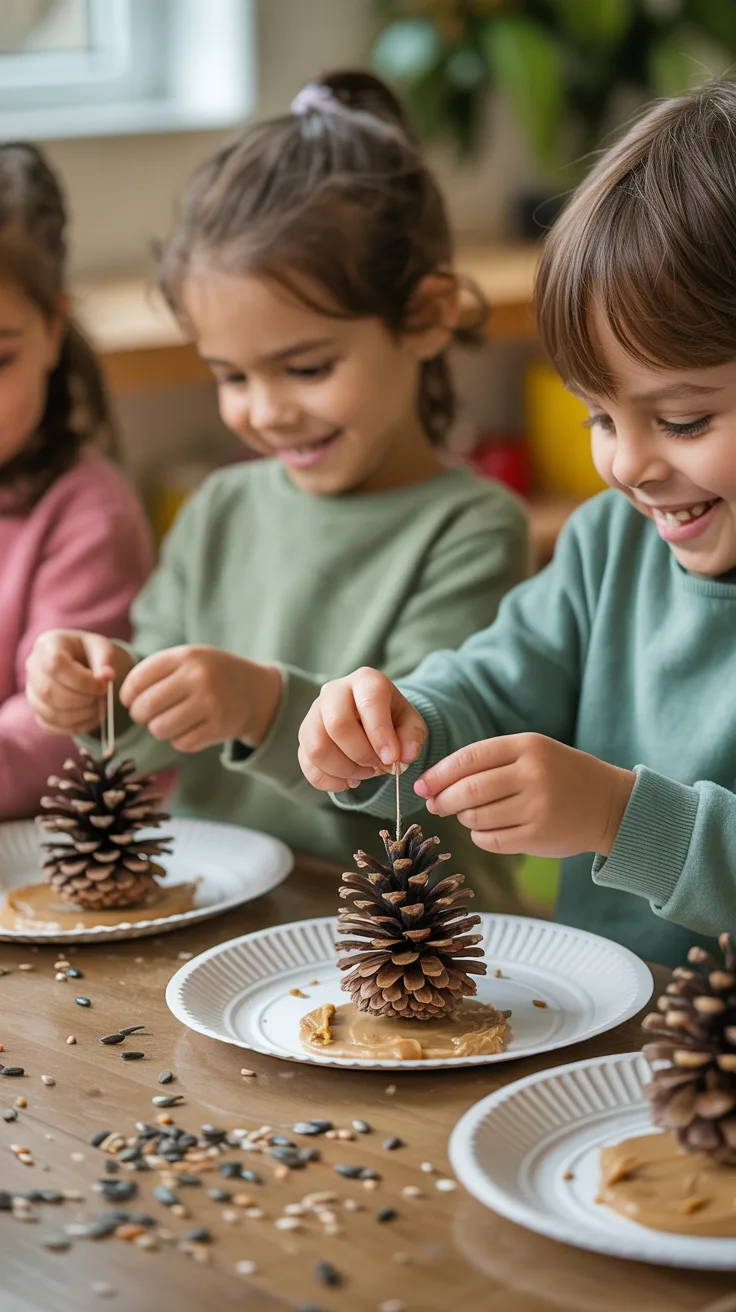
Creating bird feeders combines crafting with nature education, making it one of my favorite group activities for kids. Last spring, our neighborhood playgroup made these together, and the children were thrilled to report back on which birds visited their feeders.
This project connects children to the natural world while teaching them about local bird species and environmental stewardship.
- Materials needed: Pine cones (or toilet paper rolls), peanut butter (or bird-friendly substitute), birdseed, string, plastic knives, paper plates
- Prep time: 20 minutes to gather materials and set up stations
- Ideal age range: 4-12 years
- Mess level: High (birdseed gets everywhere!)
Have children spread peanut butter onto pine cones using plastic knives, then roll them in birdseed on paper plates. Attach string for hanging, and they’re ready to go!
Pro Tip: For children with nut allergies, use sunflower seed butter or honey (though honey feeders should be placed where they won’t attract bees near play areas). I also recommend doing this activity outside or on a plastic tablecloth for easier cleanup.
Painted Rocks
Rock painting has become incredibly popular, and for good reason! It’s accessible, affordable, and the results can be stunning. When my kids’ cousins visited last summer, we spent a delightful afternoon painting rocks that now decorate our garden.
The tactile nature of this craft appeals to children who might not enjoy paper crafts as much. Plus, the durability of the finished product means these creations can last for years.
- Materials needed: Smooth rocks (washed and dried), acrylic paint, paintbrushes, water cups, paper plates for palettes, sealant spray (optional, adult-only)
- Prep time: 30 minutes to collect and clean rocks
- Ideal age range: 5+ (younger children can participate with simplified designs)
- Mess level: Medium (paint can stain clothing)
Encourage kids to paint animals, monsters, inspirational words, or abstract designs. For younger children, dot painting using cotton swabs works well.
Pro Tip: Paint a base coat of white on rocks first to make colors pop more vibrantly. I learned this the hard way after our first rock painting session resulted in dull, barely visible designs!
Pasta Necklaces
Pasta necklaces are a classic childhood craft that never goes out of style. They’re perfect for developing fine motor skills and color recognition in younger children. When I taught preschool, this was always a hit during our “Italy” cultural week.
The simplicity of this craft makes it ideal for mixed-age groups, as even very young children can participate successfully.
- Materials needed: Various pasta shapes with holes (penne, rigatoni, wagon wheels), food coloring or liquid watercolors, rubbing alcohol (adult handling only), ziplock bags, yarn or string, tape
- Prep time: 1 day ahead to color and dry pasta
- Ideal age range: 2-8 years
- Mess level: Low (if pasta is pre-dyed)
To color pasta: Place pasta in ziplock bags, add a few drops of food coloring and a splash of rubbing alcohol, seal and shake until coated. Spread on paper towels to dry overnight. Then let children string their colorful creations!
Pro Tip: Wrap a piece of tape around one end of the string to create a “needle” that makes threading easier for little fingers. I also recommend setting out sorted containers of different pasta shapes and colors for a more organized experience.
Pro Tips for Successful Crafting Sessions
After facilitating countless group craft activities for kids, I’ve learned some valuable lessons—sometimes the hard way! Here are my top tips for making your crafting session enjoyable for everyone (including yourself):
1. Preparation is everything. Set up all materials before children arrive. I like to create individual supply kits for each child when possible, which reduces fighting over materials and keeps things moving smoothly.
2. Know your audience. Consider the age range, attention spans, and abilities of the children attending. Have simpler options available for younger kids or those who finish quickly.
3. Embrace the mess. Cover surfaces with newspaper or plastic tablecloths, have children wear old clothes or smocks, and keep cleaning supplies handy. Remember: a messy craft session often means children were fully engaged!
4. Demonstrate first. Showing a completed example and demonstrating steps helps visual learners understand what they’re aiming for.
5. Build in drying/setting time. Many crafts require drying time, so plan another activity for this period rather than having children stare at their wet creations.
6. Focus on process over product. The most valuable part of crafting is the creative process, not perfect results. Praise effort, problem-solving, and creativity rather than aesthetic perfection.
7. Recruit help. For larger groups, having another adult or older child assistant makes everything run more smoothly. I aim for a 1:5 adult-to-child ratio for most craft activities.
Remember that the goal of group craft activities is to create positive memories and foster creativity. If things don’t go exactly as planned (and they rarely do!), maintain your sense of humor and flexibility.
Frequently Asked Questions
What are the benefits of group craft activities for kids?
Group crafting develops fine motor skills, creativity, and problem-solving abilities. Beyond these individual benefits, crafting together teaches valuable social skills like sharing, taking turns, and appreciating others’ perspectives. Children also practice communication as they explain their ideas or ask for help. Perhaps most importantly, successful craft experiences build confidence and provide a sense of accomplishment.
How can I keep a group of kids engaged during craft time?
The key is preparation and pacing. Have all materials ready before starting, demonstrate the process clearly, and provide visual references. Break complex crafts into manageable steps. For younger groups, keep craft sessions under 30 minutes; older children might stay engaged for 45-60 minutes. Background music can create a pleasant atmosphere, and having “early finisher” activities ready prevents boredom for quick workers.
What materials are best for group crafts with kids?
Choose non-toxic, washable materials appropriate for the age group. Washable markers, tempera paint, school glue, and child-safe scissors are staples. Consider materials that multiple children can share without conflict (having enough is crucial). For younger groups, pre-cut some components to reduce frustration. I recommend testing any new craft materials or techniques before introducing them to a group.
How do I manage a large group during craft activities?
For groups larger than 8-10 children, divide them into smaller teams with an adult or older helper supervising each. Set up stations where small groups rotate through different parts of the craft or different activities entirely. Clearly explain expectations for behavior and material use before starting. Having a signal (like a bell or clapping pattern) to get everyone’s attention helps manage the inevitable chaos.
What are some easy clean-up tips after craft activities?
Make cleanup part of the activity by turning it into a game or challenge. Use disposable tablecloths that can be folded up with mess inside. Keep wet wipes or damp paper towels handy for sticky hands. Designate specific containers for trash, recycling, and materials to be saved. Involving children in age-appropriate cleanup teaches responsibility and respect for shared spaces.