Creating a Montessori-inspired environment at home doesn’t have to break the bank. As a parent who’s ventured into the world of Montessori education, I’ve discovered that one of the most impactful projects you can undertake is building your own Montessori toy shelf. This DIY project not only saves money but also allows you to customize the storage solution perfectly for your space and your child’s needs. Through my experience of creating several toy shelves for my children and helping other parents do the same, I’ve developed a comprehensive guide to help you build your own Montessori-inspired toy shelf that promotes independence, organization, and engagement in your little one’s play area.
Understanding Montessori Toy Storage Principles
Before diving into the construction process, it’s essential to understand the core principles behind Montessori toy storage. These principles will guide your design decisions and ensure your DIY shelf serves its intended purpose effectively.
Key Montessori Storage Principles:
– Visual accessibility
– Easy reach for children
– Simple, organized layout
– Limited toy rotation
– Natural materials when possible
The Montessori approach emphasizes order and accessibility, allowing children to:
– Select activities independently
– Return items to their designated spots
– Develop responsibility and organization skills
– Feel empowered in their environment
Here’s a quick comparison of traditional vs. Montessori toy storage:
| Traditional Storage | Montessori Storage |
|---|---|
| Toys piled in boxes | Items displayed individually |
| Deep toy boxes | Shallow shelves |
| Adult-height storage | Child-height accessibility |
| Multiple toys visible at once | Limited, curated selection |
Essential Materials and Tools
Through trial and error, I’ve identified the most effective materials for creating a sturdy, child-safe Montessori toy shelf. Here’s your comprehensive shopping list:
Materials Needed:
– 3/4″ plywood or solid wood boards
– Wood screws (1-1/4″ and 2″)
– Wood glue
– Sandpaper (medium and fine grit)
– Non-toxic wood finish
– Corner brackets
– Wall anchors
– Safety straps
Tools Required:
– Circular saw or table saw
– Drill with bits
– Measuring tape
– Pencil
– Level
– Safety equipment (goggles, gloves)
– Sander (optional but recommended)
Cost Breakdown:
| Item | Estimated Cost |
|---|---|
| Wood materials | $40-60 |
| Hardware | $15-25 |
| Finish | $10-20 |
| Tools (if needed) | $50-100 |
Pro Tip: Consider borrowing tools from friends or renting from local hardware stores to reduce costs.
Step-by-Step Construction Guide
Let me walk you through the construction process, incorporating lessons learned from my own experience building multiple shelves.
1. Planning and Measurement
– Determine shelf dimensions (recommended heights):
– Total height: 30-36 inches
– Shelf depth: 12 inches
– Width: 36-48 inches
– Space between shelves: 8-12 inches
2. Cutting the Wood
– Cut the following pieces:
– 2 side panels
– 2-3 horizontal shelves
– 1 back panel
– 1 base board
3. Assembly Process
a) Sand all pieces thoroughly
b) Attach side panels to base board
c) Install back panel for stability
d) Add horizontal shelves
e) Secure all joints with both screws and wood glue
4. Finishing Touches
– Sand any rough edges
– Apply non-toxic finish
– Allow 24-48 hours drying time
– Install safety features
Common Mistakes to Avoid:
– Rushing the sanding process
– Skipping the back panel
– Not pre-drilling screw holes
– Forgetting to account for baseboards
Safety Features and Considerations
Safety should be your top priority when creating furniture for children. Here are essential safety features to incorporate:
Critical Safety Elements:
– Anti-tip straps
– Rounded corners
– Smooth surfaces
– Secure mounting
– Appropriate height
Child Safety Checklist:
– No sharp edges or splinters
– Stable base design
– Well-secured shelves
– Non-toxic materials
– Proper wall anchoring
Safety Testing Protocol:
| Test | Method |
|---|---|
| Stability | Push test from multiple angles |
| Weight capacity | Load test each shelf |
| Edge safety | Run cloth along all edges |
| Tip resistance | Gentle forward pressure test |
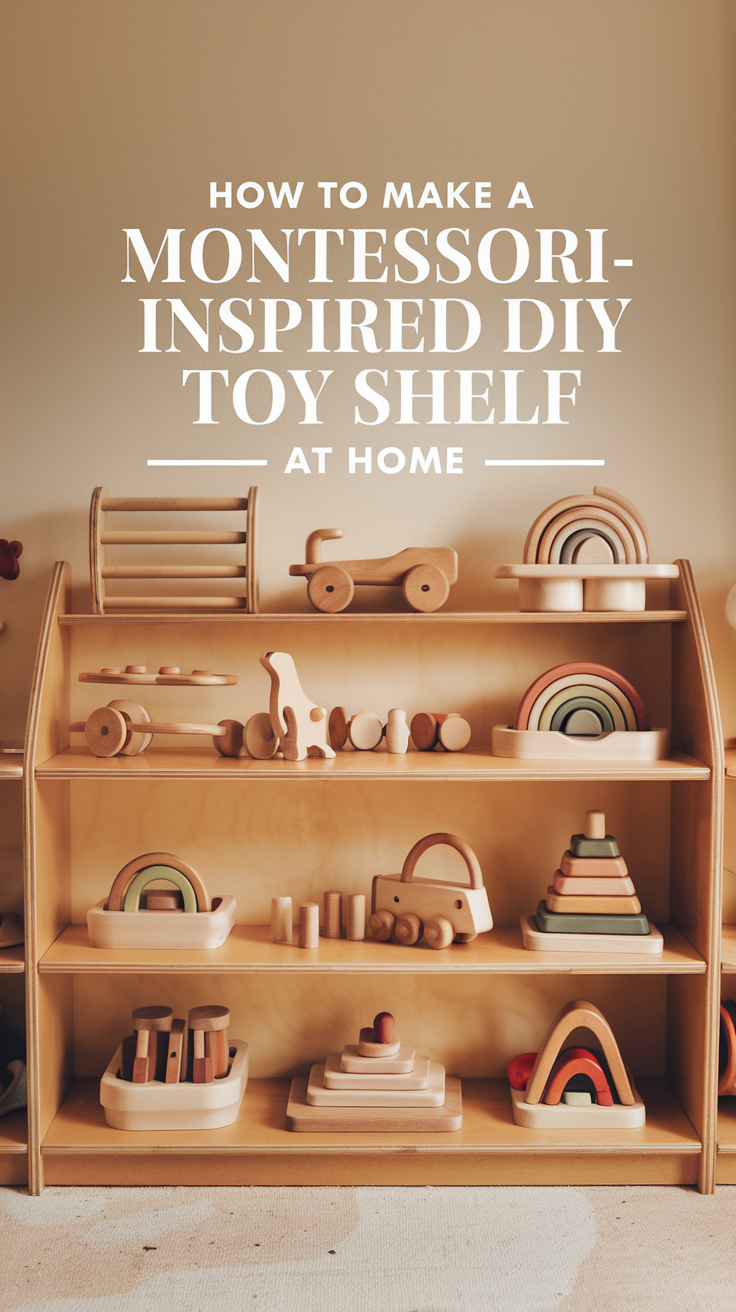
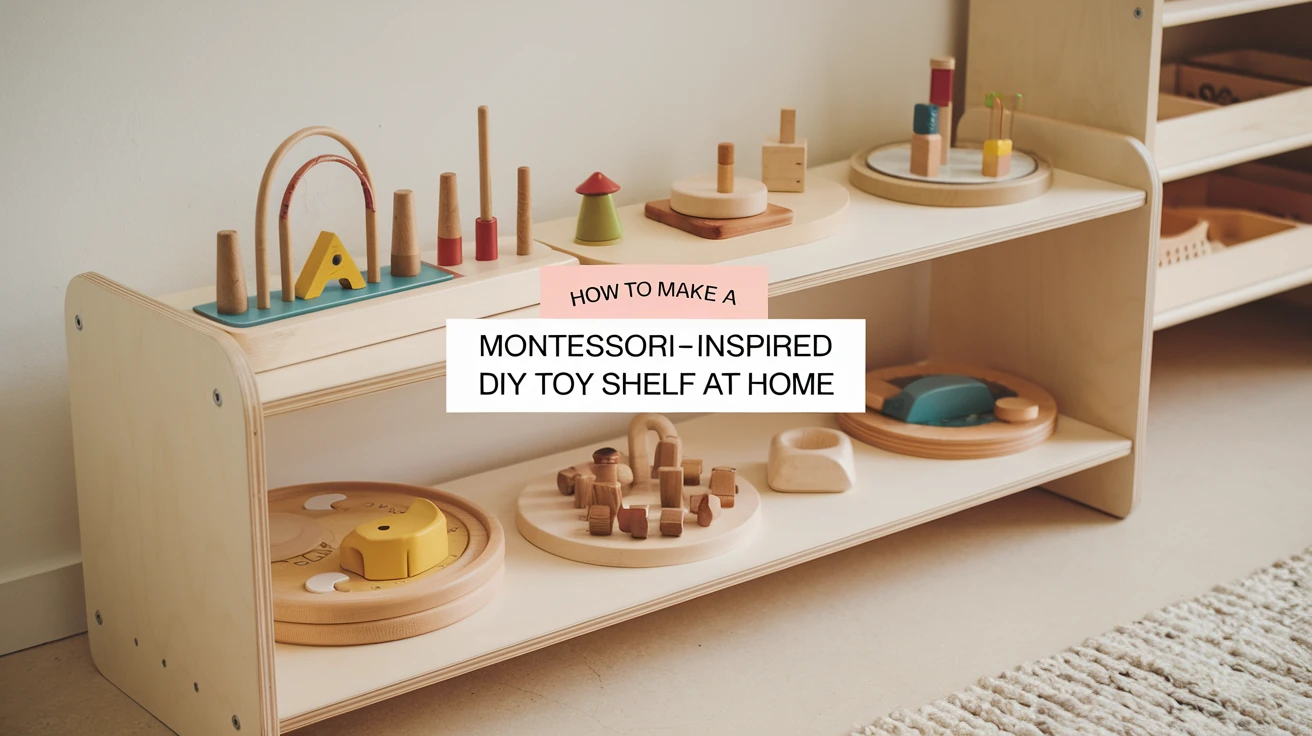
Organization and Display Techniques
The way you organize the shelf is just as important as its construction. Here’s how to maximize its educational value:
Organization Principles:
– Group similar items together
– Maintain clear sight lines
– Rotate toys regularly
– Keep it minimal
Display Categories:
– Practical life materials
– Sensorial activities
– Language materials
– Mathematical concepts
– Cultural items
Space Management Tips:
– Leave breathing room between items
– Use neutral containers
– Place popular items at eye level
– Implement a rotation system
Organization Schedule:
| Timeframe | Action |
|---|---|
| Daily | Basic tidying |
| Weekly | Material rotation |
| Monthly | Deep cleaning |
| Seasonal | Complete refresh |
Customization and Maintenance Tips
Make your shelf unique and keep it looking fresh with these customization and maintenance suggestions:
Customization Options:
– Natural wood stains
– Painted sections
– Additional dividers
– Adjustable shelving
– Mobile base addition
Maintenance Schedule:
– Daily dusting
– Weekly deep clean
– Monthly hardware check
– Quarterly refinishing assessment
Remember to:
– Check stability regularly
– Tighten loose screws
– Refresh finish as needed
– Adjust height as child grows
Conclusion
Creating a DIY Montessori toy shelf is more than just a woodworking project – it’s an investment in your child’s independence and development. Through careful planning, proper construction, and thoughtful organization, you can create a beautiful and functional piece that will serve your family for years to come. Remember that perfection isn’t the goal; functionality and safety are what matter most. Start small, learn from the process, and enjoy watching your child thrive in their carefully prepared environment.
Key Takeaways
- Proper planning and measurements are crucial for success
- Safety features should never be compromised
- Regular maintenance ensures longevity
- Organization is key to Montessori principles
- Customization options can grow with your child
Frequently Asked Questions
-
How long does it take to build a Montessori toy shelf?
With proper planning and all materials on hand, the basic construction can be completed in 4-6 hours. However, allow 2-3 days for finishing and drying time.
-
What’s the ideal height for a Montessori shelf?
The ideal height depends on your child’s age, but generally, 30-36 inches is appropriate for toddlers and preschoolers.
-
Can I use MDF instead of solid wood?
While MDF is more affordable, solid wood or high-quality plywood is recommended for durability and safety, especially considering potential moisture exposure.
-
How do I prevent the shelf from tipping?
Always secure the shelf to the wall using appropriate anchors and anti-tip straps, regardless of its weight or stability.
-
What’s the best finish to use?
Use non-toxic, child-safe finishes like water-based polyurethane or natural oils such as linseed or tung oil.
-
How many toys should be displayed at once?
Follow the “less is more” principle – typically 8-12 items displayed at a time, depending on shelf size and child’s age.
-
Can I make adjustable shelves?
Yes, using shelf pins and multiple pre-drilled holes allows for adjustable heights as your child’s needs change.
-
What’s the approximate cost compared to store-bought?
A DIY shelf typically costs $75-150 to build, while comparable store-bought Montessori shelves can range from $200-500.
-
How often should toys be rotated?
Typically, rotate toys every 1-2 weeks based on your child’s interest and engagement levels.
-
Can I paint the shelf bright colors?
While possible, Montessori principles suggest using natural or neutral colors to avoid distracting from the materials displayed.