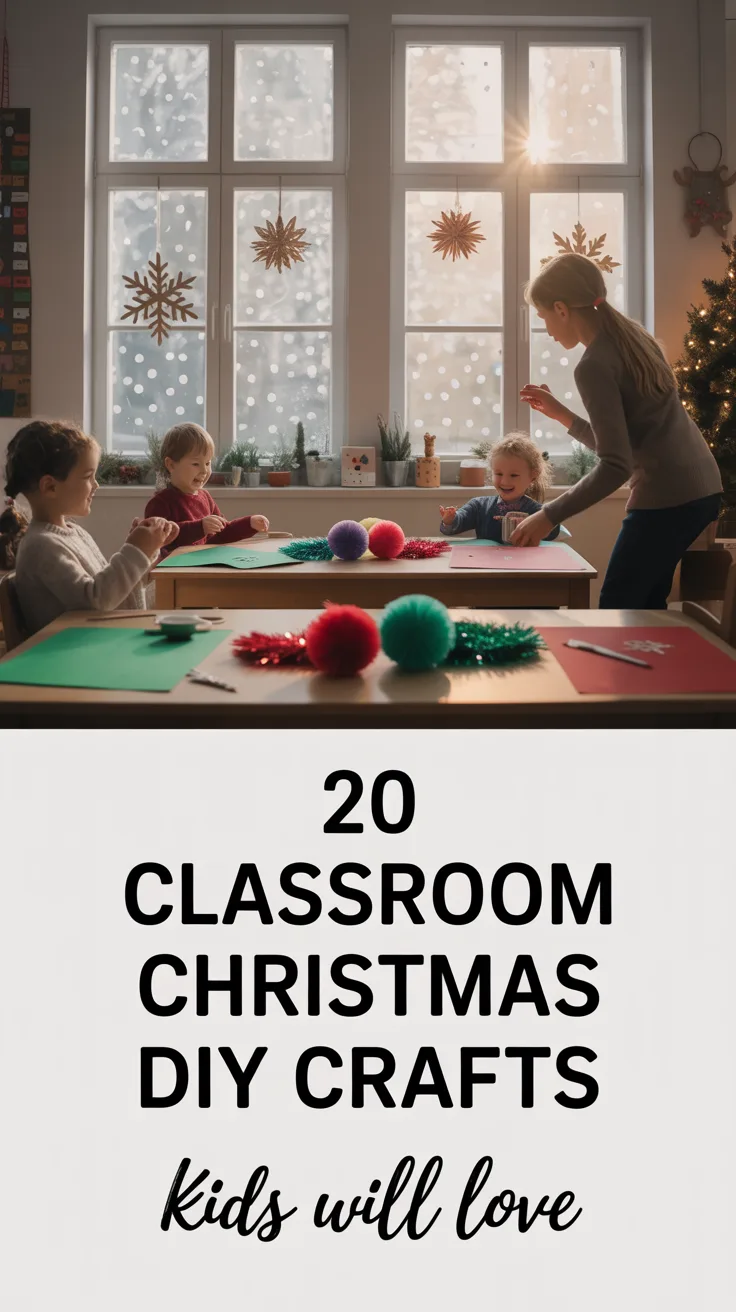
Introduction to Thanksgiving Crafts
As a mom of three, I’ve learned that Thanksgiving is more than just a delicious meal – it’s an opportunity to create meaningful memories with our kids. Every year, I find myself searching for new Thanksgiving crafts that will keep little hands busy while teaching them about gratitude and togetherness.
I still remember the year my youngest decided to “help” by spilling an entire bottle of glitter on our dining room table the day before guests arrived. Despite the cleanup chaos (we still find sparkles years later!), the pride on his face when he presented his handmade centerpiece made it all worthwhile.
These DIY Thanksgiving crafts aren’t just about keeping kids entertained—they’re about giving them a sense of contribution to the holiday. There’s something magical about watching a child beam with pride when a relative compliments the turkey decoration they made themselves.
Let’s dive into 10 kid-friendly crafts that are simple enough for little ones but engaging enough for older kids too!
1. Paper Plate Turkeys
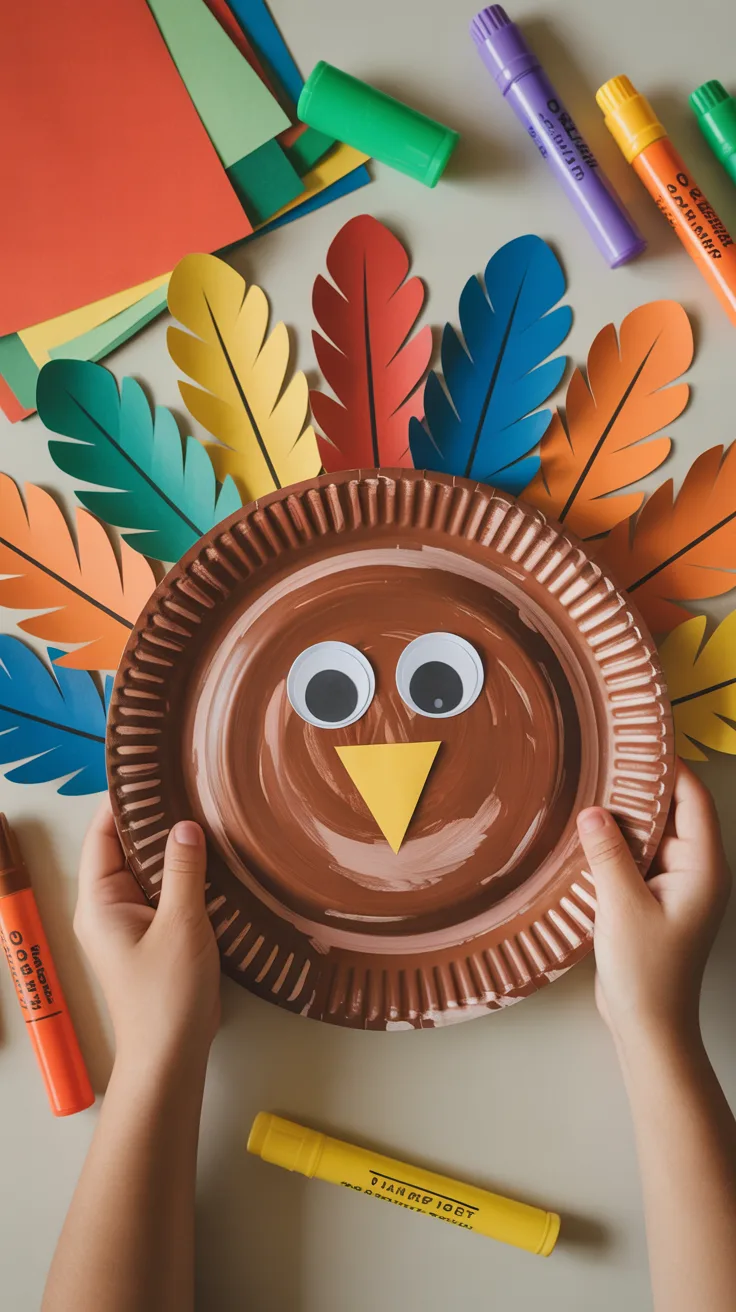
Paper plate turkeys were the first Thanksgiving craft I ever attempted with my kids, and they remain a favorite in our household. The beauty of this craft lies in its simplicity and the fact that you likely have most materials already.
- Small paper plates (for the turkey body)
- Construction paper in fall colors (red, orange, yellow, brown)
- Googly eyes
- Glue or tape
- Scissors
- Markers or paint
Have your child paint or color the paper plate brown for the turkey’s body. Then, cut feather shapes from colorful construction paper. Let your child arrange and glue these to the back of the plate. Add googly eyes, a small triangle for the beak, and a red waddle to complete your gobbler!
Pro Tip: If you’re working with toddlers, pre-cut the feathers and let them focus on the fun part—arranging and gluing. For older kids, challenge them to cut their own unique feather shapes.
2. Handprint Leaves
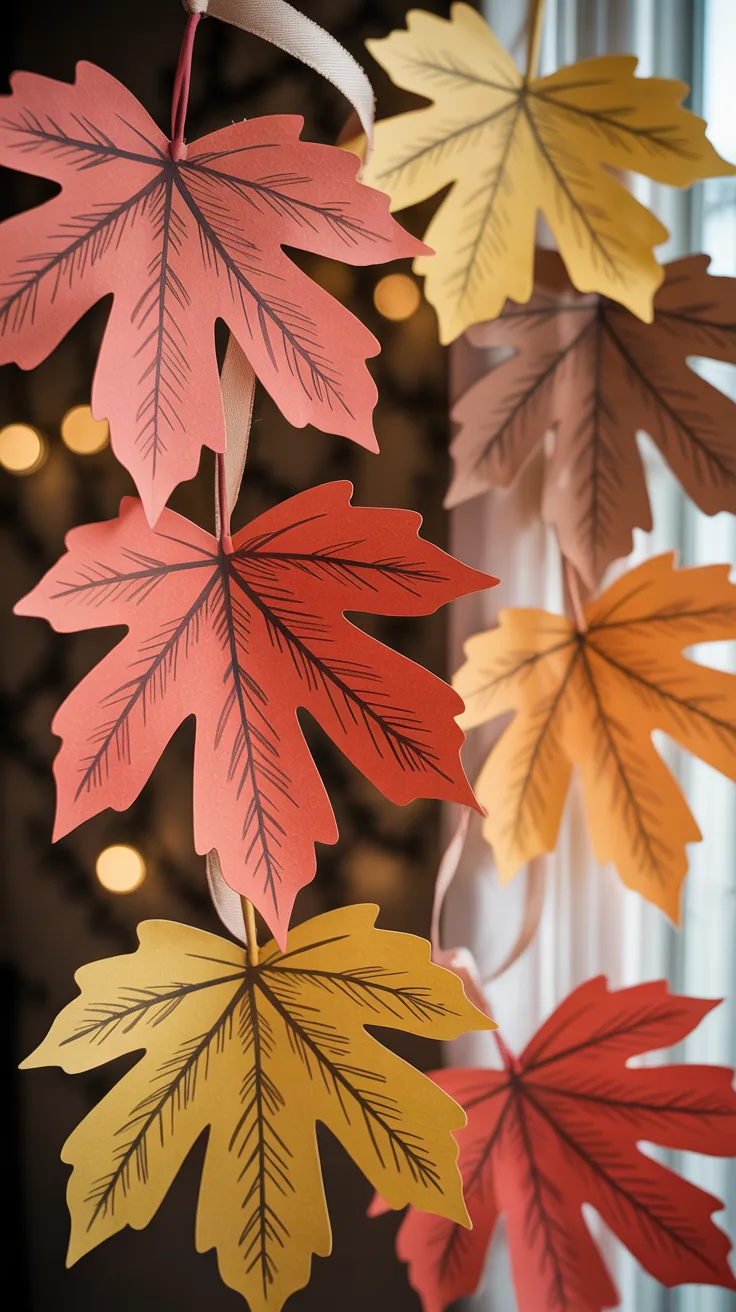
I’ve saved handprint crafts from every year of my children’s lives, and they’re some of my most treasured keepsakes. These handprint leaves capture not just creativity but also how quickly those little hands grow!
- Construction paper in fall colors
- Scissors
- Pencil for tracing
- Markers or crayons
- String or ribbon (optional, for hanging)
Trace your child’s hand on colored paper—red, orange, yellow, and brown work beautifully. Cut out the handprint and use markers to add leaf veins. These can be strung together as garland, used as place cards, or simply displayed around your home.
Pro Tip: Create a family tree by using handprints from everyone in the family. Label each with names and the year to create a keepsake you’ll cherish for years to come.
3. Pinecone Centerpieces
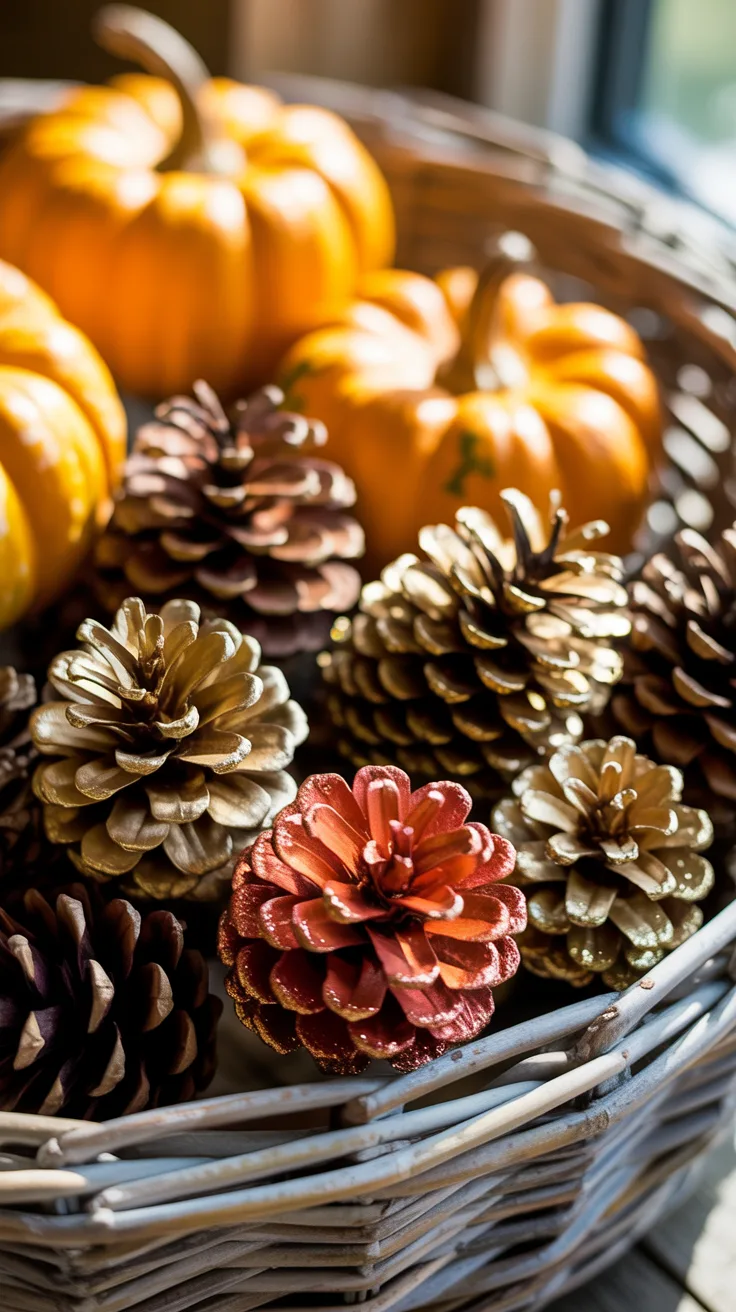
Last fall, my kids and I spent an afternoon collecting pinecones at the park. What started as a simple nature walk turned into our favorite centerpiece project! These natural decorations bring the outdoors in and cost virtually nothing to make.
- Pinecones (collected from outdoors or purchased)
- Acrylic paint in fall colors
- Paint brushes
- Glitter (optional)
- Small bowl or basket
- Ribbon or twine
Clean your pinecones by shaking out debris and letting them dry completely. Paint the tips of the pinecone scales in fall colors like gold, orange, or deep red. For added sparkle, sprinkle a little glitter while the paint is still wet. Once dry, arrange them in a decorative bowl with some mini pumpkins or gourds.
Pro Tip: If you’re feeling ambitious, dip the bottom of each pinecone in white paint to create a “snow-dipped” effect that can transition into winter decorations after Thanksgiving.
4. Thanksgiving Greeting Cards
In our digital age, there’s something extra special about receiving a handmade card. My children’s grandparents treasure these simple expressions of gratitude more than any store-bought gift.
- Card stock or construction paper
- Markers, crayons, or colored pencils
- Stickers or stamps
- Glue
- Scissors
- Pressed leaves (optional)
Fold card stock in half to create a card base. Let kids decorate the front with Thanksgiving-themed drawings, stickers, or even pressed leaves collected from the yard. Inside, encourage them to write a simple message of thanks or gratitude specific to the recipient.
Pro Tip: For pre-writers, ask them what they’re thankful for about each person and write their exact words inside. The authentic voice of a child expressing gratitude is priceless!
5. Corn Husk Dolls
I’ll admit, the first time I tried making corn husk dolls with my kids, they looked more like corn husk blobs! But with practice, this traditional craft has become a meaningful way to connect with America’s agricultural heritage.
- Dried corn husks (available at craft stores or from fresh corn)
- String or twine
- Scissors
- Fabric scraps
- Markers (optional, for faces)
- Bowl of water for soaking husks
Soak corn husks in water until pliable. Fold one husk in half for the body, then wrap another around the top to form a head. Tie with string at the neck. For arms, roll a husk and tie at the waist. Dress your doll with fabric scraps tied on with string. Add facial features with markers if desired.
Pro Tip: Make a whole family of dolls in different sizes. These make wonderful Thanksgiving table decorations with historical significance you can discuss during dinner.
6. Leaf Garland
The year I was too pregnant to climb a ladder for decorating, my older kids created a leaf garland that transformed our living room. It was so beautiful that it’s become a tradition, even though I can now reach the high places again!
- Real or artificial autumn leaves
- String, yarn, or twine
- Needle with large eye (for older kids) or tape
- Scissors
- Clear nail polish (optional, for preserving real leaves)
If using real leaves, press them between book pages for a few days, then coat with clear nail polish to preserve. For younger children, use artificial leaves for safety and durability. Punch a small hole near the stem of each leaf and thread string through, or simply tape leaves to a length of string or yarn.
Pro Tip: Create a pattern with different leaf shapes and colors for a more visually interesting garland. Hang across windows, doorways, or along the mantel.
7. Thanksgiving Wreaths
Our front door was looking rather plain until my daughter decided it needed a “thankful wreath.” Now, creating a new wreath design has become our November tradition, and neighbors often stop to compliment her creations.
- Cardboard ring or foam wreath form
- Artificial leaves, pinecones, or other fall elements
- Ribbon or burlap
- Hot glue gun (adult supervision required) or craft glue
- Wire or string for hanging
Cut a ring from cardboard or use a purchased foam form. Help children arrange and glue fall elements around the wreath. Add a ribbon bow at the bottom or top. Attach a loop of wire or string to hang your masterpiece.
Pro Tip: Create a gratitude wreath by adding small tags where family members can write what they’re thankful for. Visitors can add their own gratitude notes when they arrive for Thanksgiving dinner.
8. Pumpkin Painting
After a pumpkin-carving disaster that left my kitchen looking like a horror movie scene, we switched to pumpkin painting. It’s cleaner, safer, and the decorations last much longer!
- Small pumpkins or gourds (mini pumpkins work great for little hands)
- Acrylic paint
- Paintbrushes
- Markers
- Glitter, sequins, or stickers (optional)
- Clear sealer (optional, for longevity)
Clean pumpkins with a damp cloth and dry completely. Let kids paint designs, faces, or patterns on their pumpkins. For younger children, washable markers work well too. Once dry, add embellishments with glue if desired.
Pro Tip: Create patterned pumpkins by applying stickers or tape in designs, painting the entire pumpkin, then removing the stickers once dry to reveal the pattern underneath.
9. Gratitude Tree
The gratitude tree has become the centerpiece of our Thanksgiving celebration. What started as a simple craft has evolved into a meaningful family tradition that helps us all focus on what truly matters.
- Tree branches in a vase or pot
- Construction paper in fall colors
- Scissors
- String or ribbon
- Hole punch
- Markers or pens
Collect sturdy branches and arrange in a vase weighted with stones. Cut leaf shapes from construction paper. Punch a hole in each leaf and add string for hanging. Throughout November, family members write things they’re grateful for on leaves and hang them on the tree.
Pro Tip: Keep your gratitude tree up from early November through Thanksgiving, adding new leaves regularly. During Thanksgiving dinner, take turns reading the leaves aloud as a beautiful reflection on your blessings.
10. Button Acorns
Button acorns were born from my desperate attempt to use up my overflowing button collection. They’ve since become one of our quickest and most satisfying Thanksgiving crafts!
- Brown buttons of various sizes
- Felt in brown or tan
- Scissors
- Glue
- Twine or string (optional, for hanging)
Cut small acorn cap shapes from felt. Glue buttons to the felt caps to create acorns. These can be glued to cards, strung together as garland, or placed in a small dish as table decorations.
Pro Tip: Use buttons with interesting textures and patterns for more visually appealing acorns. Vintage buttons work especially well for