Introduction
Easter is just around the corner, and if you’re anything like me, you’re probably looking at the growing pile of recyclables thinking, “There’s got to be something better I can do with this stuff!” Well, you’re in luck! Creating upcycled Easter toys is not only eco-friendly and budget-conscious but also a fantastic way to spend quality time with your little ones. I’ve been making DIY Easter crafts with my kids for years, and I’m constantly amazed at how everyday household items can transform into cherished playthings with just a bit of creativity and glue. In this article, I’ll share 15 imaginative ways to turn your trash into Easter treasure. Trust me, your kids won’t even realize they’re playing with yesterday’s cereal box!
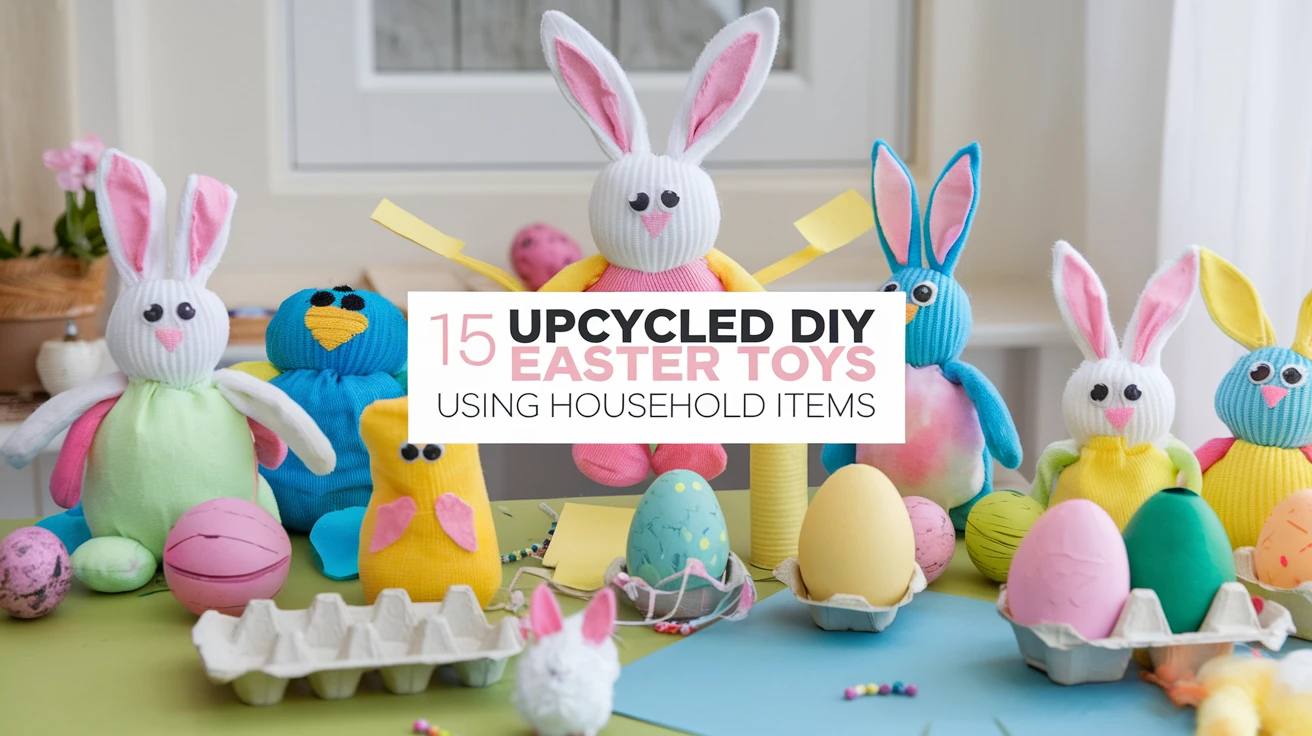
1. Sock Bunnies
Don’t throw away those single socks! Transform them into adorable bunny companions that are perfect for Easter morning surprises.
What you’ll need:
- Orphaned socks (preferably light colors)
- Rice or dried beans for filling
- Rubber bands
- Buttons or felt for eyes
- Pipe cleaners for whiskers
- Ribbon
How to make it: Fill the sock with rice or beans about 2/3 full. Create a “head” by tying off with a rubber band. Cut the remaining part of the sock in half lengthwise to make ears. Secure with another rubber band or stitches. Add button eyes, a small pom-pom or button nose, and pipe cleaner whiskers. Finish with a cute ribbon bow tie.
Pro Tip: Use colorful socks for a unique twist, or add fabric paint to create patterns on white socks!
2. Toilet Paper Roll Bunnies
Those cardboard tubes from toilet paper or paper towels make perfect bodies for Easter bunnies and can be customized in endless ways.
What you’ll need:
- Toilet paper or paper towel tubes
- Construction paper or paint
- Googly eyes
- Pom-poms for noses
- Construction paper for ears
- Glue
How to make it: Paint the tube or wrap it in colored paper. Cut out two long ear shapes from construction paper and attach them to the inside of the tube. Glue on googly eyes and a pom-pom nose. Draw whiskers with a marker or add pipe cleaners.
Pro Tip: Fill these bunnies with small treats for an extra special Easter surprise!
3. Egg Carton Chicks
Egg cartons are practically begging to be transformed into Easter crafts—it’s their destiny! These little chicks are super cute and make great Easter basket additions.
What you’ll need:
- Cardboard egg cartons
- Yellow paint
- Orange construction paper
- Googly eyes
- Glue
- Scissors
- Yellow feathers (optional)
How to make it: Cut individual cups from the egg carton. Paint them yellow and let dry. Cut small triangles from orange construction paper for beaks and feet. Attach googly eyes and the beak with glue. Add feathers for extra fluff if desired.
Pro Tip: Make a whole family of chicks in different sizes by using both regular and mini egg cartons!
4. Plastic Bottle Shakers
Turn empty plastic bottles into festive noise-making toys that double as sensory tools for younger children.
What you’ll need:
- Empty plastic bottles with caps
- Dried beans, rice, or beads
- Easter-themed stickers or paint
- Colored tape
- Ribbon
How to make it: Clean and dry the bottles thoroughly. Fill about 1/4 of the bottle with your noisemaking materials. Secure the cap tightly (you might want to hot glue it for extra security). Decorate the outside with Easter stickers, paint, or wrap with colored tape. Add ribbons around the neck for extra flair.
Pro Tip: Use different fillings to create various sounds—rice makes a gentle sound, while beans create a louder rattle.
5. Cardboard Tube Bunny Puppets
These puppets are perfect for imaginative play and storytelling, helping to bring the Easter bunny to life!
What you’ll need:
- Cardboard tubes
- Construction paper
- Craft sticks
- Markers or crayons
- Glue
- Cotton balls for tails
How to make it: Cover the tube with construction paper. Draw or attach a bunny face at the top. Cut out and attach paper ears to the top of the tube. Glue a cotton ball to the back for a tail. Attach a craft stick to the bottom so kids can hold and manipulate the puppet.
Pro Tip: Create an entire Easter puppet show with bunnies, chicks, and eggs for hours of entertainment!
6. Paper Plate Easter Baskets
Who needs to buy an Easter basket when you can make charming, personalized ones from paper plates?
What you’ll need:
- Paper plates
- Stapler
- Paints or markers
- Pipe cleaners for handles
- Easter grass (or shredded paper)
- Decorations (stickers, sequins, etc.)
How to make it: Fold a paper plate in half. Staple the edges together, leaving the top open. Punch holes on opposite sides near the top and thread a pipe cleaner through for a handle. Decorate with Easter designs, fill with Easter grass, and add small toys or treats.
Pro Tip: Use a hole punch to create decorative patterns along the edges of your basket for an extra special touch!
7. Mason Jar Easter Snow Globes
Repurpose those glass jars into magical Easter scenes that kids will love to shake and display.
What you’ll need:
- Clean glass jars with lids
- Small Easter figurines or toys
- Glycerin (available at pharmacies)
- Distilled water
- Glitter
- Strong glue (waterproof)
- Easter ribbon
How to make it: Glue your figurine to the inside of the jar lid. Let dry completely. Fill the jar almost to the top with distilled water and add a few drops of glycerin (this helps the glitter float). Add a pinch of glitter. Apply waterproof glue to the rim of the jar and screw the lid on tightly. Let dry, then turn over and shake!
Pro Tip: If you’re concerned about leaks, apply a line of waterproof silicone sealant around the edge of the lid after closing.
8. Fabric Scrap Stuffed Eggs
Those fabric scraps from old projects can find new life as soft, squeezable Easter eggs that won’t break!
What you’ll need:
- Fabric scraps
- Needle and thread or sewing machine
- Stuffing (can use old pillow stuffing)
- Ribbon or embroidery floss for decoration
- Egg-shaped template
How to make it: Cut two identical egg shapes from fabric using your template. Place right sides together and sew around the edge, leaving a small opening. Turn right side out, stuff, and hand-stitch the opening closed. Decorate with ribbon, buttons, or embroidery as desired.
Pro Tip: Add a small bell inside before stuffing completely for an added sensory element!
9. Tin Can Bunny Planters
Transform empty food cans into adorable bunny planters that can hold small plants, flowers, or even be used as pencil holders.
What you’ll need:
- Clean tin cans (labels removed)
- White or pastel paint
- Felt or construction paper
- Googly eyes
- Pom-poms
- Glue
- Soil and small plants (optional)
How to make it: Paint the can and let dry. Cut bunny ear shapes from felt or construction paper and glue to the inside back of the can so they stick up. Add googly eyes and a pom-pom nose to the front. You can also draw whiskers with a marker. Fill with soil and a small plant, or use as a cute storage container.
Pro Tip: Plant fast-growing grass seeds for “bunny hair” that kids can trim!
10. Bottle Cap Easter Magnets
Don’t toss those bottle caps! With a bit of creativity, they become adorable Easter-themed refrigerator magnets.
What you’ll need:
- Clean plastic or metal bottle caps
- Small magnets
- Strong glue
- Paint or colored paper
- Small decorations (tiny pom-poms, sequins)
- Clear sealant (optional)
How to make it: Paint the inside of the bottle cap or cut a circle of colored paper to fit inside. Create tiny Easter designs like bunnies, chicks, or eggs using paint or small craft items. Once dry, apply a drop of clear sealant if desired. Glue a small magnet to the back.
Pro Tip: Create a matching set with different Easter designs for a cohesive look on your refrigerator!
11. Cereal Box Easter Puzzles
Cereal boxes have the perfect weight cardboard for creating custom Easter puzzles that are both toys and art projects.
What you’ll need:
- Empty cereal boxes
- White paper
- Markers, crayons, or paints
- Scissors
- Glue
How to make it: Cut a panel from a cereal box. Glue white paper to one side and let dry. Draw or paint an Easter scene on the white side. Once completely dry, cut into puzzle pieces (simple shapes for younger kids, more complex for older ones). Store in a small bag or container.
Pro Tip: Trace the outline of cookie cutters to create puzzle piece shapes that are Easter-themed!
12. Newspaper Easter Egg Decorations
Yesterday’s news becomes today’s Easter decorations with this papier-mâché project that’s perfect for older kids.
What you’ll need:
- Newspaper strips
- Balloons (water balloon size works best)
- Papier-mâché paste (flour and water)
- Paint
- String for hanging
- Glitter, sequins, or other decorations
How to make it: Blow up balloons to egg shapes. Cover with several layers of newspaper strips dipped in paste, letting dry between layers. Once completely dry, pop the balloon and remove it. Cut an opening if desired to create a hollow decoration. Paint and decorate, then add string for hanging.
Pro Tip: Add a layer of white paper or tissue paper as your final layer before painting for brighter colors!
13. Old Crayon Easter Candles
Those broken crayon bits at the bottom of the art box can be melted down to create beautiful Easter-themed candles.
What you’ll need:
- Old crayons with papers removed
- Small heat-safe containers (like egg cups)
- Candle wicks
- Double boiler or microwave-safe container
- Popsicle sticks for stirring
How to make it: Note: Adult supervision required. Sort crayons by color. Melt similar colors together using a double boiler or microwave (low power, 30-second intervals). Place wicks in containers, securing with a dab of melted crayon. Pour in melted crayon, alternating colors for a layered effect. Let cool completely before use.
Pro Tip: Use egg-shaped silicone molds for Easter-themed candles that look especially festive!
14. T-shirt Yarn Easter Wreaths
Old t-shirts get a second life as colorful yarn that’s perfect for creating soft, tactile Easter wreaths.
What you’ll need:
- Old t-shirts in spring colors
- Scissors
- Cardboard ring (cut from a cereal box)
- Easter decorations (small plastic eggs, felt flowers)
- Glue
How to make it: Cut t-shirts into strips to make “yarn” (search online for “t-shirt yarn tutorial”). Wrap the yarn around the cardboard ring, completely covering it. Secure ends with glue. Decorate with small Easter items, attaching them with more t-shirt yarn or glue.
Pro Tip: Mix different colored t-shirt yarns for a rainbow effect that’s perfect for spring!
15. Plastic Egg Maracas
Those leftover plastic eggs from last Easter can become musical instruments with just a few additions!
What you’ll need:
- Plastic Easter eggs
- Dried beans, rice, or beads
- Plastic spoons
- Colorful tape (washi tape works great)
- Stickers for decoration
How to make it: Fill plastic eggs about 1/3 full with dried beans or rice. Secure the egg closed with tape around the middle. Tape two plastic spoons on either side of the egg, handles facing outward, to create handles. Decorate with colorful tape and stickers.
Pro Tip: Use different fillings in different eggs to create a variety of sounds for a homemade Easter orchestra!
Key Takeaways from These Upcycled Easter Toys
- Almost any household item can be transformed into a fun Easter toy with a little creativity.
- Upcycling teaches children about sustainability while providing entertainment.
- These DIY projects save money compared to store-bought Easter items.
- Many of these toys can become cherished keepsakes that last beyond the Easter season.
- Creating upcycled toys together builds family bonds and creates memories.
Conclusion
Creating upcycled Easter toys isn’t just about saving money or being eco-friendly—though those are fantastic benefits! It’s about infusing the holiday with personal touches that make it special and memorable. When my kids look at their Easter baskets filled with toys we made together, there’s a sense of pride and connection that no store-bought item could ever provide. Plus, these projects create opportunities for quality time and conversations that strengthen family bonds. So before you toss that empty toilet paper roll or orphaned sock, consider its potential as your next Easter masterpiece. Your wallet, the environment, and your children will all thank you! Which of these upcycled Easter toys will you try first?
Frequently Asked Questions
-
How do I prepare household items for upcycling into Easter toys?
Always clean items thoroughly before upcycling. Wash fabric items, rinse and dry containers, and remove any sharp edges from cardboard or plastic. For food containers like tin cans, ensure they’re completely clean and sand down any sharp edges. Items should be completely dry before crafting to prevent mold growth in the finished toys.
-
Are these upcycled Easter toys safe for very young children?
Always supervise young children with handmade toys. For children under 3, avoid small parts that could be choking hazards, such as buttons, beads, or small decorations. Consider using fabric paint instead of buttons for eyes, and ensure all parts are securely attached. The sock bunnies, fabric eggs, and t-shirt wreaths are generally safer options for the youngest children.
-
How long do these upcycled Easter toys typically last?
The durability varies by project. Fabric items like sock bunnies and t-shirt wreaths can last for years if properly made. Paper-based crafts are more temporary but can be preserved with a coating of Mod Podge or clear acrylic spray. Mason jar snow globes and plastic bottle shakers are quite durable and may become long-lasting keepsakes.
-
Can I make these upcycled Easter toys ahead of time?
Absolutely! Most of these projects can be made weeks in advance. Store them in a cool, dry place away from direct sunlight to prevent fading. For the tin can planters, you can prepare the containers ahead of time but wait until closer to Easter to add live plants. The newspaper egg decorations benefit from extra drying time, so those are perfect for making early.
-
What household items are best for upcycling into Easter toys?
The most versatile items include toilet paper rolls, egg cartons, plastic bottles, old socks, t-shirts, and cardboard boxes. Start saving these items a month or two before Easter. Other useful items include bottle caps, paper plates, newspaper, and glass jars. Even broken crayons, fabric scraps, and single buttons can find new life in Easter crafts!
-
How can I involve my kids in making upcycled Easter toys?
Assign age-appropriate tasks to keep everyone involved. Younger children can help with painting, applying stickers, or stuffing fabric toys. Older kids can assist with cutting, gluing, and more detailed decorating. Set up an assembly line for family crafting sessions where everyone has a role. Make it festive with Easter music and snacks to create a memorable crafting experience!
-
Are there any upcycled Easter toys that can be used as gifts?
Many of these projects make wonderful gifts! The mason jar snow globes, fabric stuffed eggs, and candles are particularly gift-worthy. The tin can bunny planters with live flowers make thoughtful presents for grandparents or teachers. Package your handmade items in upcycled containers decorated with Easter themes for an extra-special touch that’s entirely eco-friendly.
